Observability Adventures in Grafana
I was bored, so I observed

I was bored, so I wanted to try something fun for the day: add observability using grafana. I have used it before in the past, I thought it would be fun to see how much I can do on android.
Grafana Setup
Installation
Termux’s default repos comes packaged with grafana. The install process is as easy as:
1
pkg install grafana
To run grafana, one needs to specify the home directory. That can be found at:
$PREFIX/share/grafana. To start grafana, we run the command:
1
grafana server --homepath=$PREFIX/share/grafana
I mostly place long commands as an alias or a script. I did just that for this as well.
Limitations On Android
One of the things I wanted to access and query in grafana are logs. But installing and setting up loki had a lot of build issues. It had to do with platform compactibility and libraries that are not found in the android’s linux kernel. Loki kept crashing. I tried to install the sqlite plugin as an alternative to stream logs, but that had similar issues.
I switched to a proot-distro, but the results were the same.
Adding a Data Source
I don’t think I need to explain what data source is, right?
We can access our grafana web UI at locahost:3000. The default user is admin, default password is also admin. Login and choose to create a new password or skip it altogether. We should see something like this:
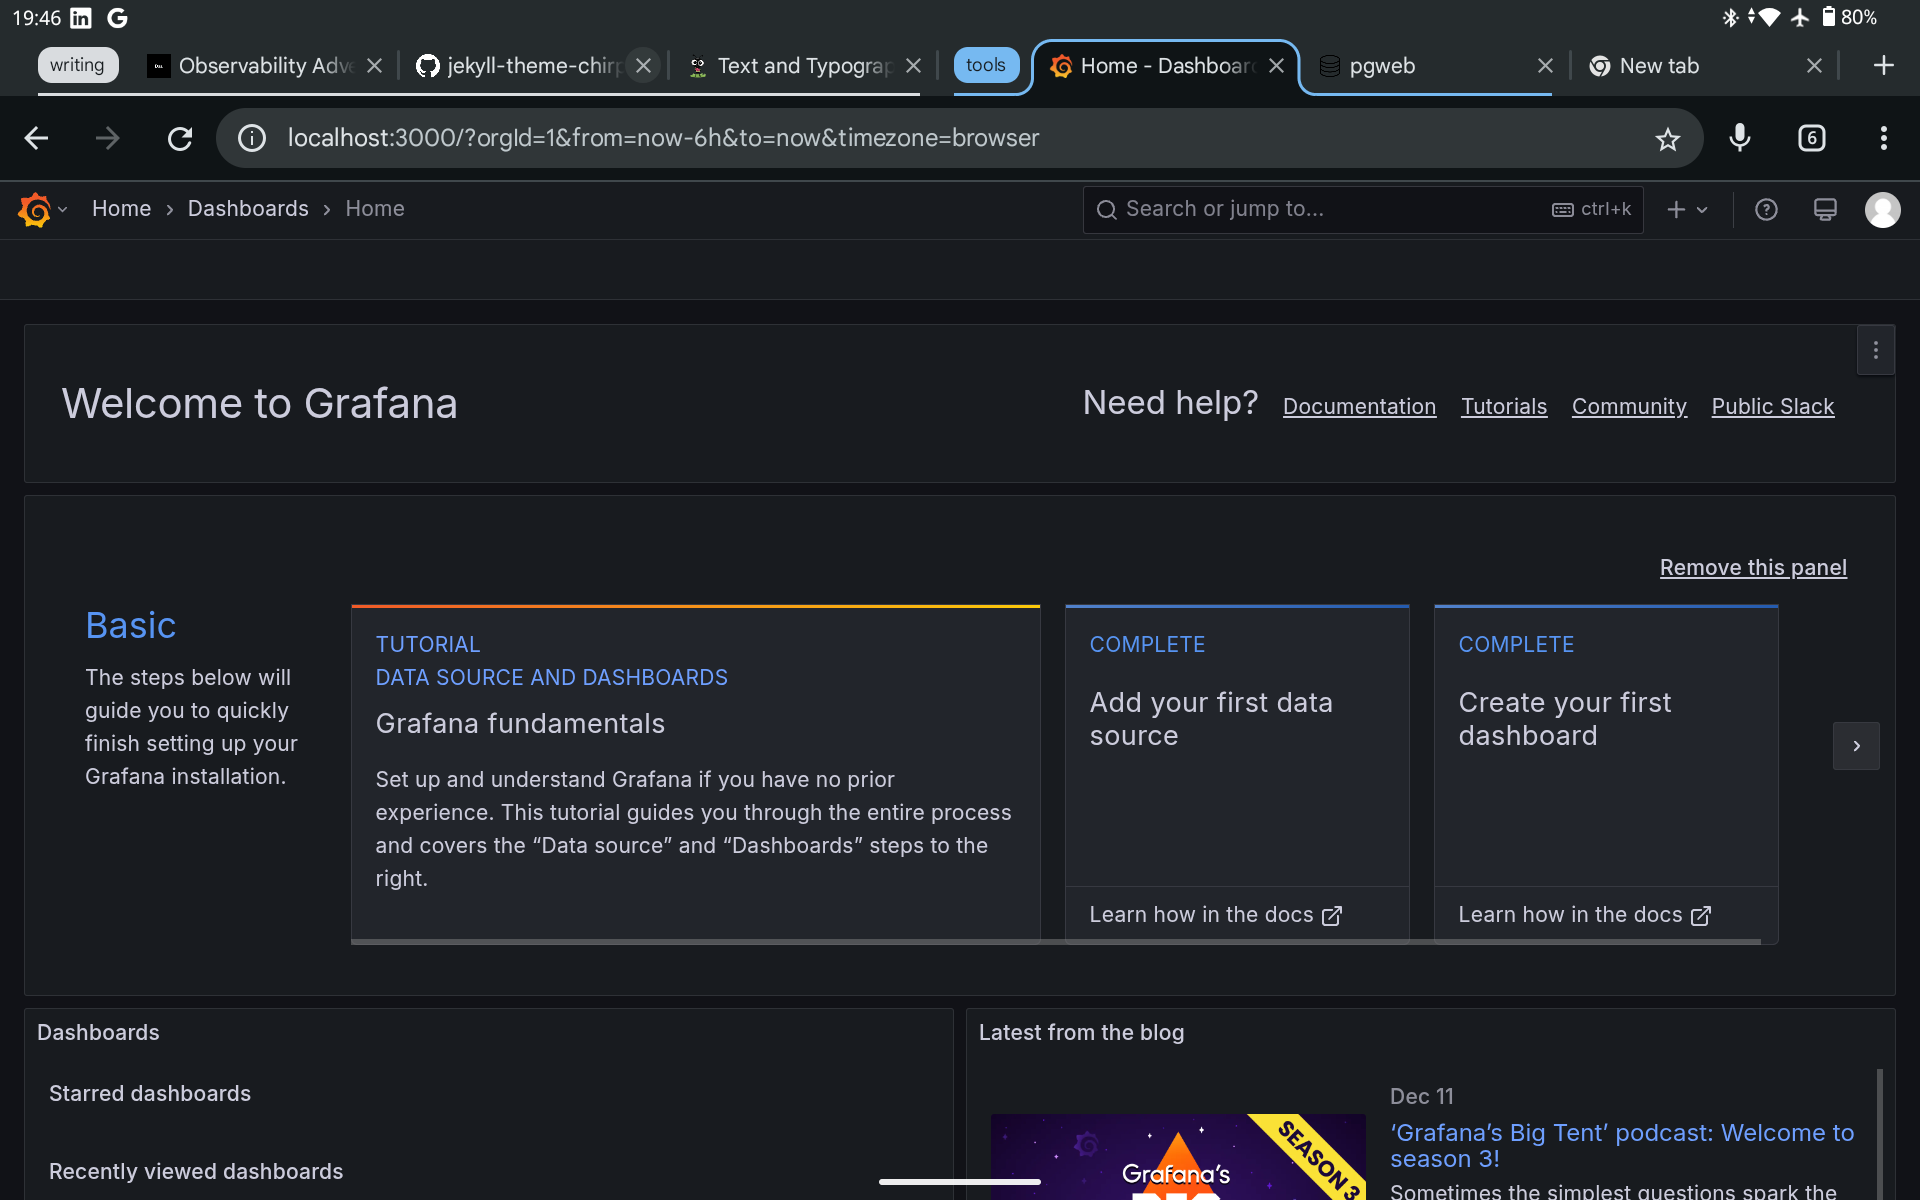 Grafana landing page after login
On the side menu (clicking the icon), go to data sources
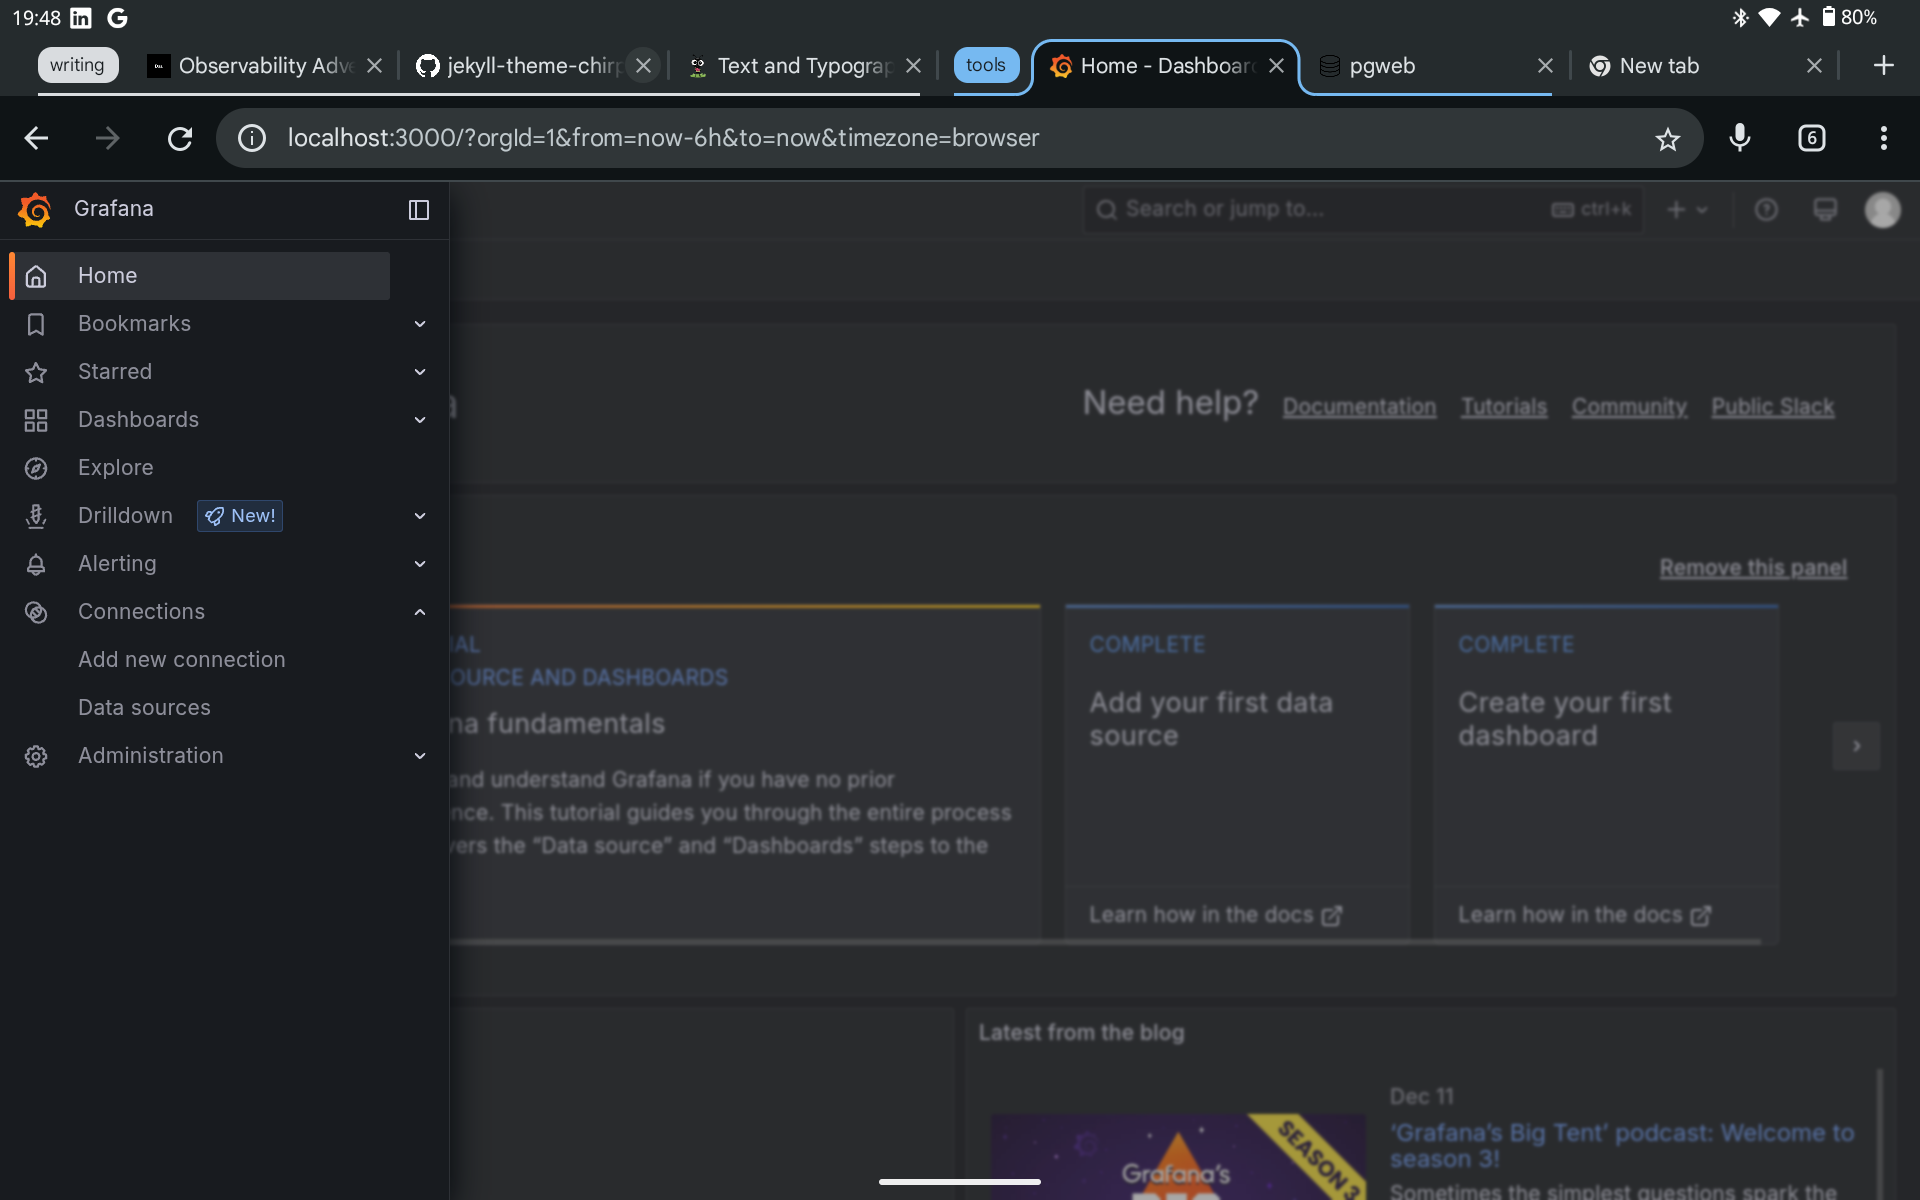 Grafana Side Menu
Next, click on add a new data source, search and select postgres. Then, fill in your connection details and save.
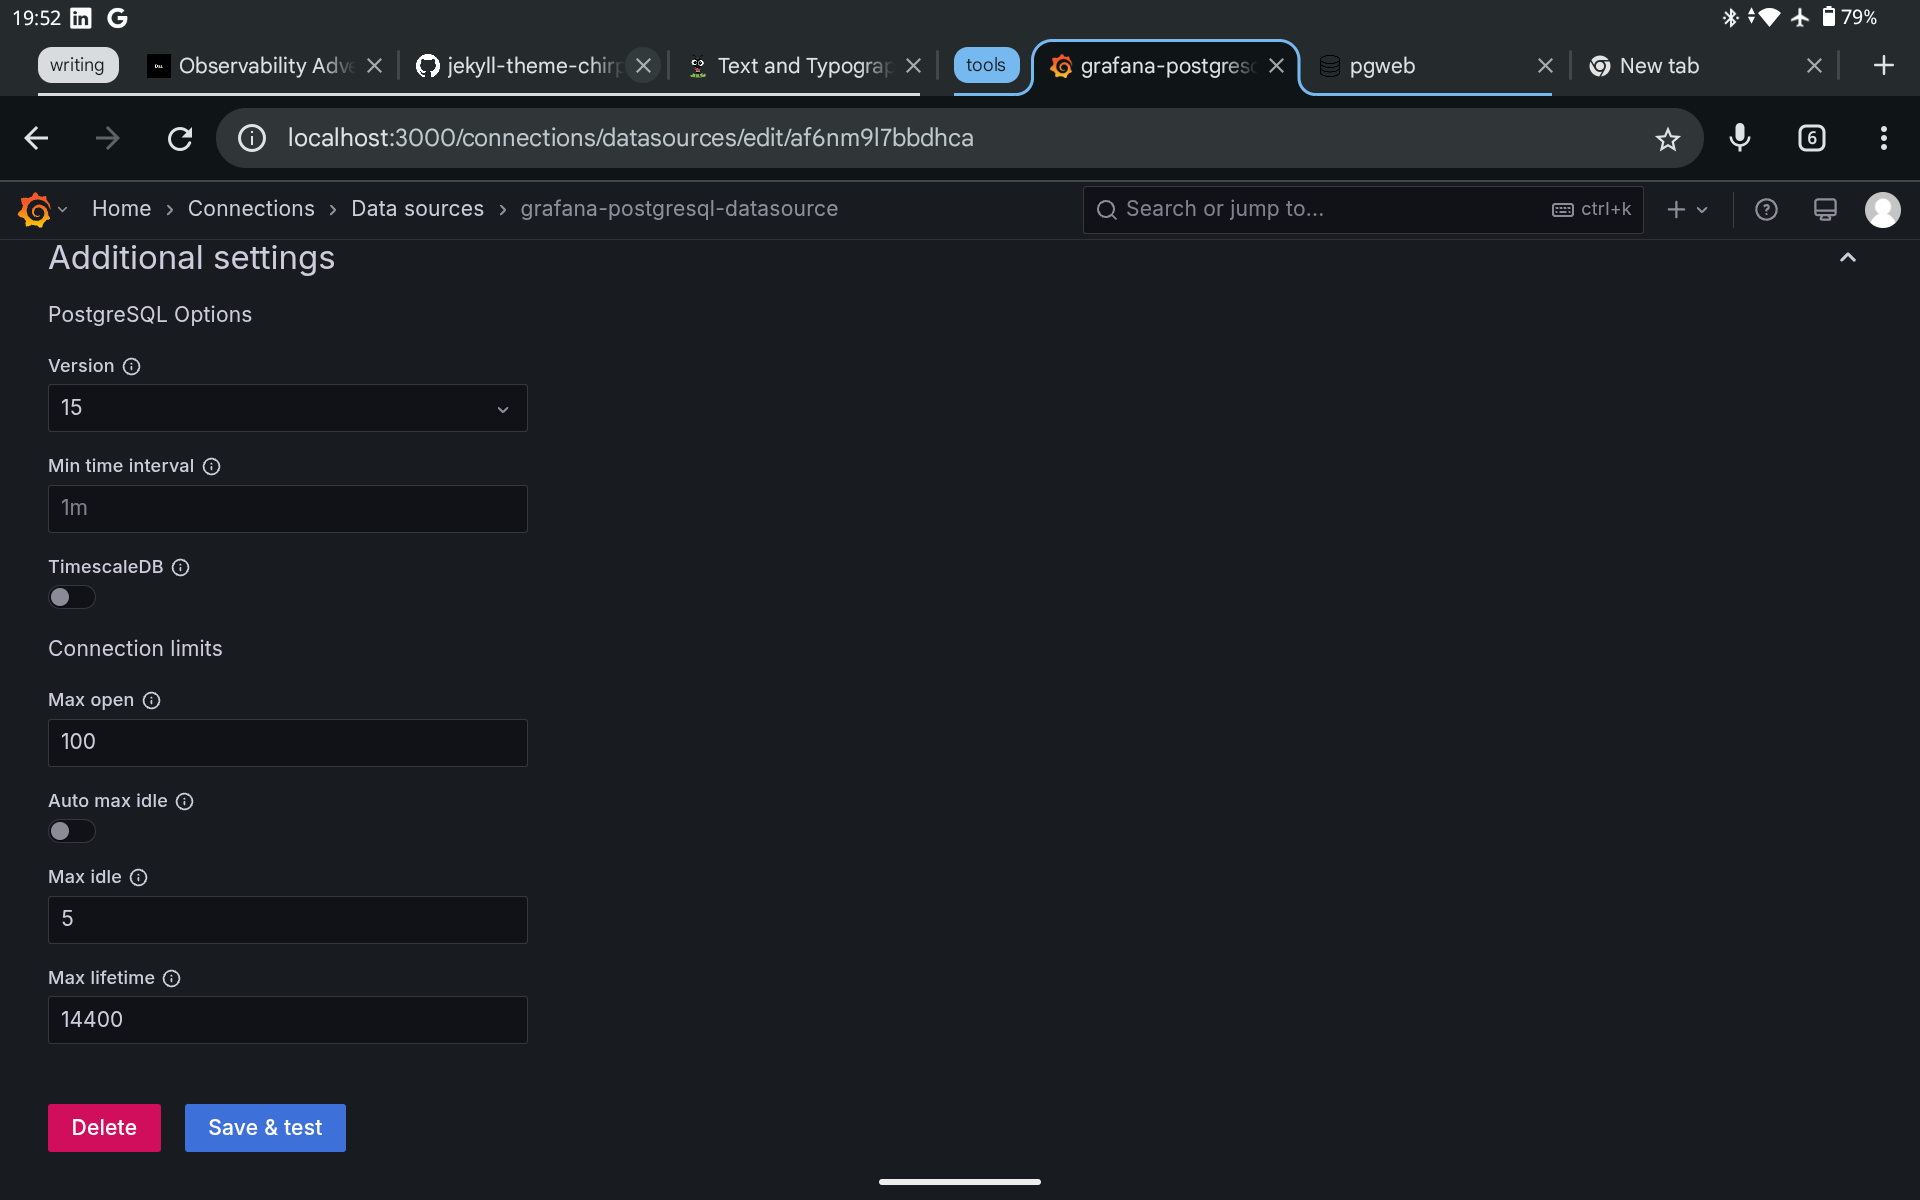 Saving postgresql data source
When the connection is successful, you can go back to home.
Tracking Query Time
Database Prep
For my first exploration, I sought to track how long it took for my queries to run; not because I have to, but because I can. We need to make some changes to our postgres configuration to access such data.
Add this line your postgres config:
1
shared_preload_libraries = 'pg_stat_statements'
The library is made accessible as an extension. Run this in your query window. If you use schemas (highly recommend), then run it in your schema context. It helps reduce the noise of accessing statistics in multiple schemas if you have one. Anyways, it is just preference.
Run this:
1
2
-- for monitoring
CREATE EXTENSION pg_stat_statements;
When you check your views, you should see these 2 guys:
- pg_stat_statements: The view we will be querying. It has the data we need.
- pg_stat_statements_info: Used to track the last time the
pg_stat_statementsview was reset. We won’t touch this.
 The 2 views from the
 pg_stat_statements extension
The pg_stat_statements view has a lot of data. You pick what you need. I went
through each and picked these. This is what my query for getting my statistics
look like:
1
2
3
-- query statistics
SELECT userid, dbid, query, calls, mean_exec_time
FROM fatch.pg_stat_statements;
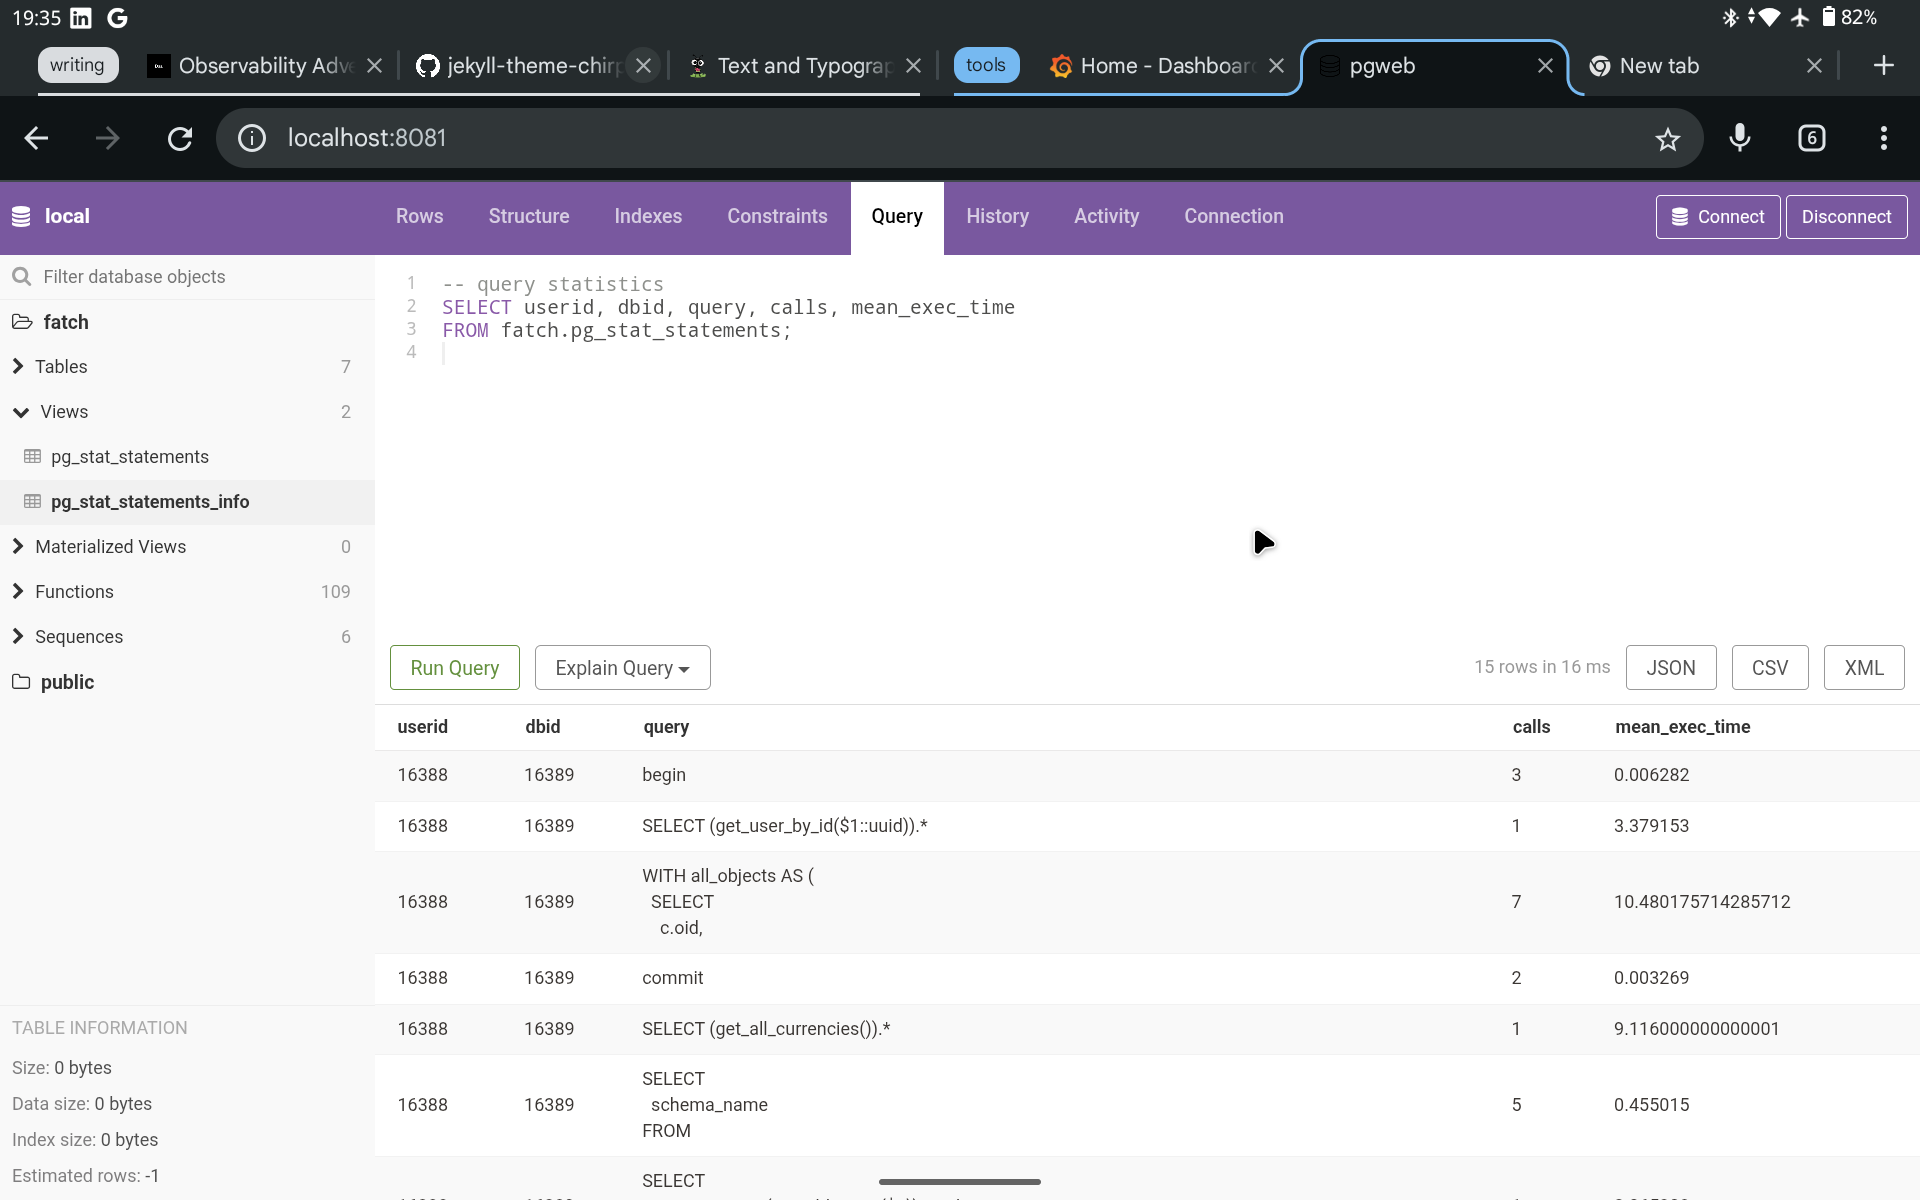 Query Results
Viewing Stats in Grafana
- In our Grafana web UI, we want to navigate to dashboards and create a new dashboard.
- You will see Add Visualization. That is the option to go for.
- You will be prompted to select a data source. Pick the postgresql option.
There are 2 ways to query a data source in grafana:
- A query: You write your own queries. Under queries, there are two options:
- Builder: Using the grafana UI tools to select your query options.
- Code: Write the code yourself. In our case, that is SQL.
- An expression: These are different flavors of expression. Available options are:
- Mathematical.
- Reduce.
- Resample.
- Classic condition.
- Threshold.
There is no better way. It comes down to preference. This is not a grafana tutorial. For more information visit Grafana docs.
I used a query (code option). We will run the same query I shared earlier:
1
2
SELECT userid, dbid, query, calls, mean_exec_time
FROM fatch.pg_stat_statements;
Then pick the table view. This is what mine looks like:
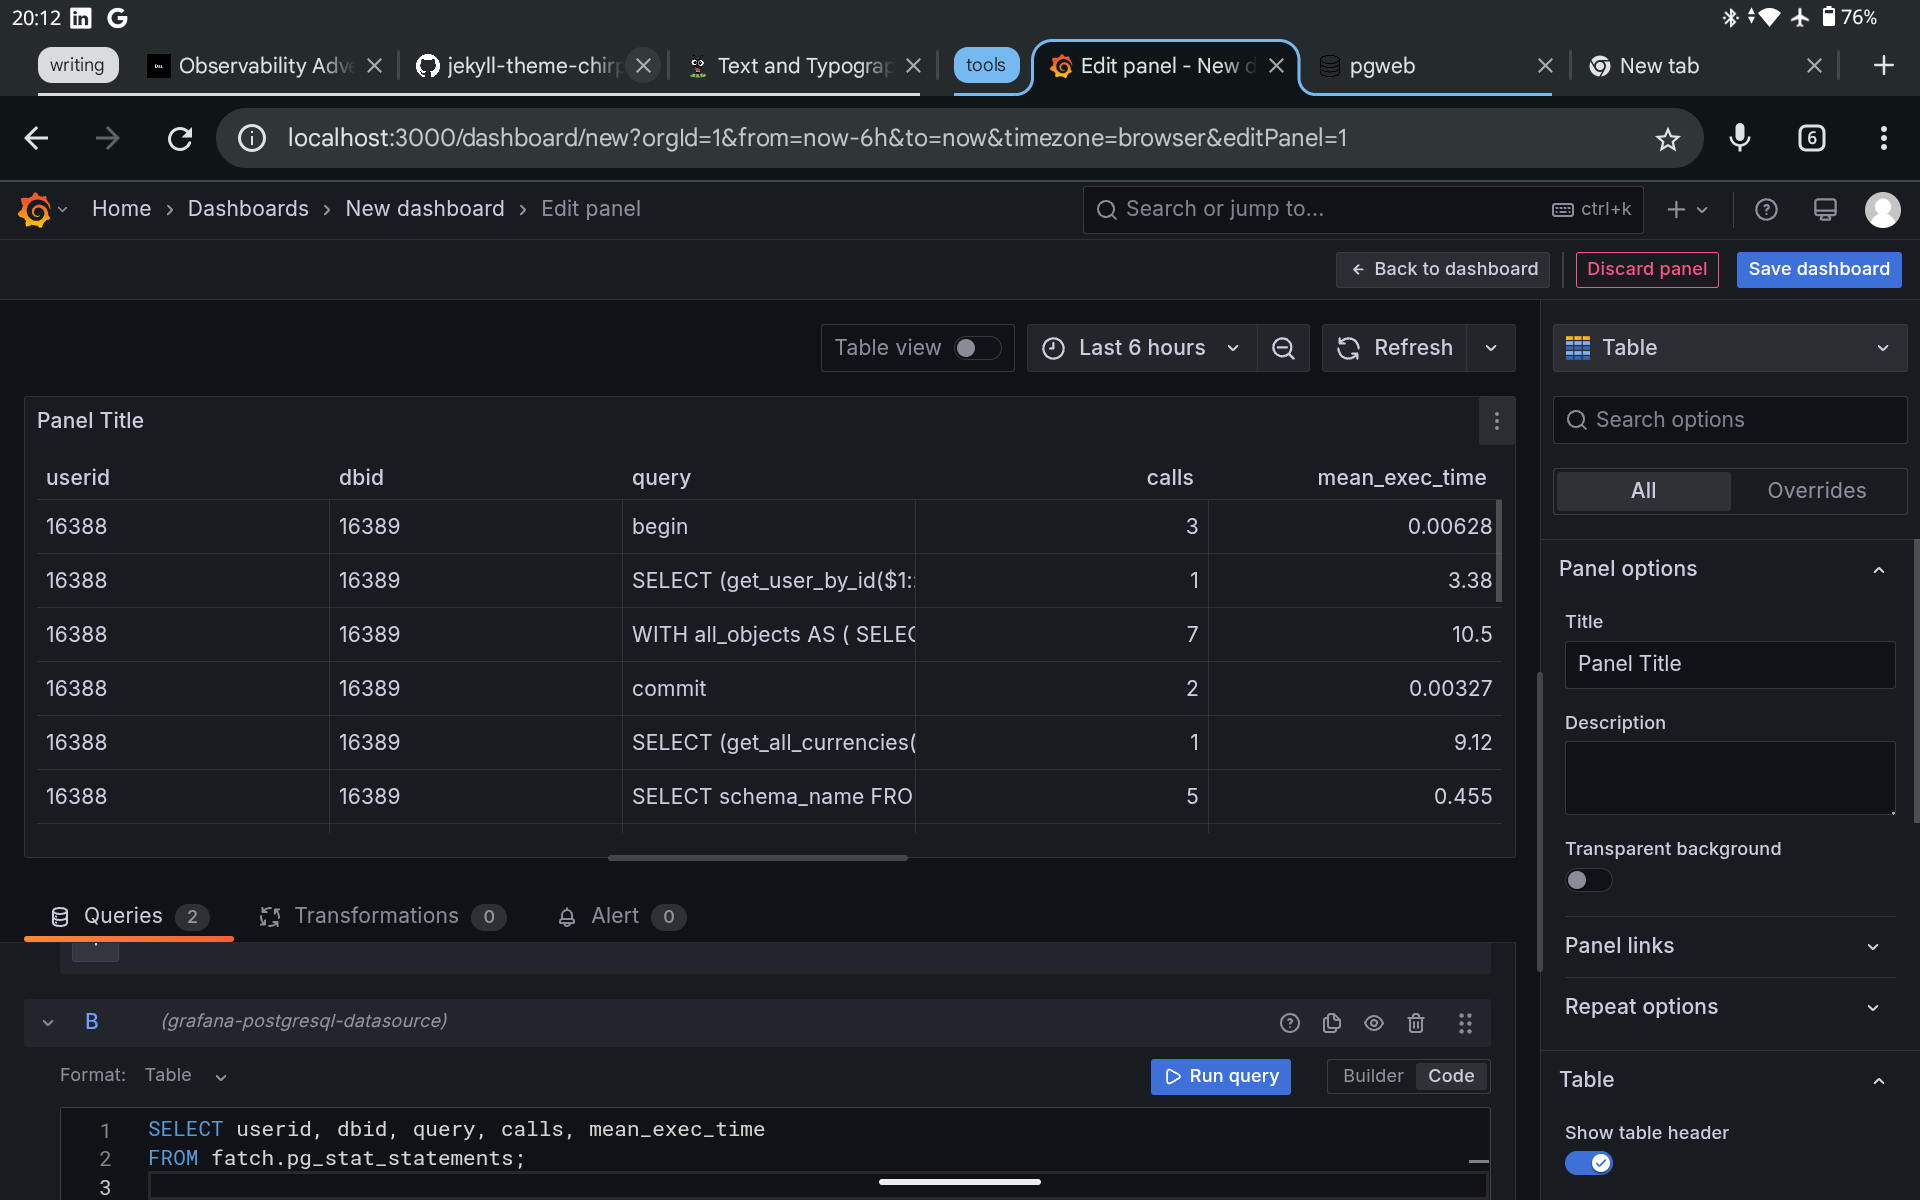 Table view of statistics
Save the dashboard. You can always refresh to get the latest data or setup auto refresh.
Right now, it may not look like match, but we can aggregate for a group of queries and find out how many times they are called and their mean execution time. We can set threshold values to see when latency is in the red. You can go the extra mile and set up alert systems. The possibilities are endless. Let me give you a screenshot of what I started creating:
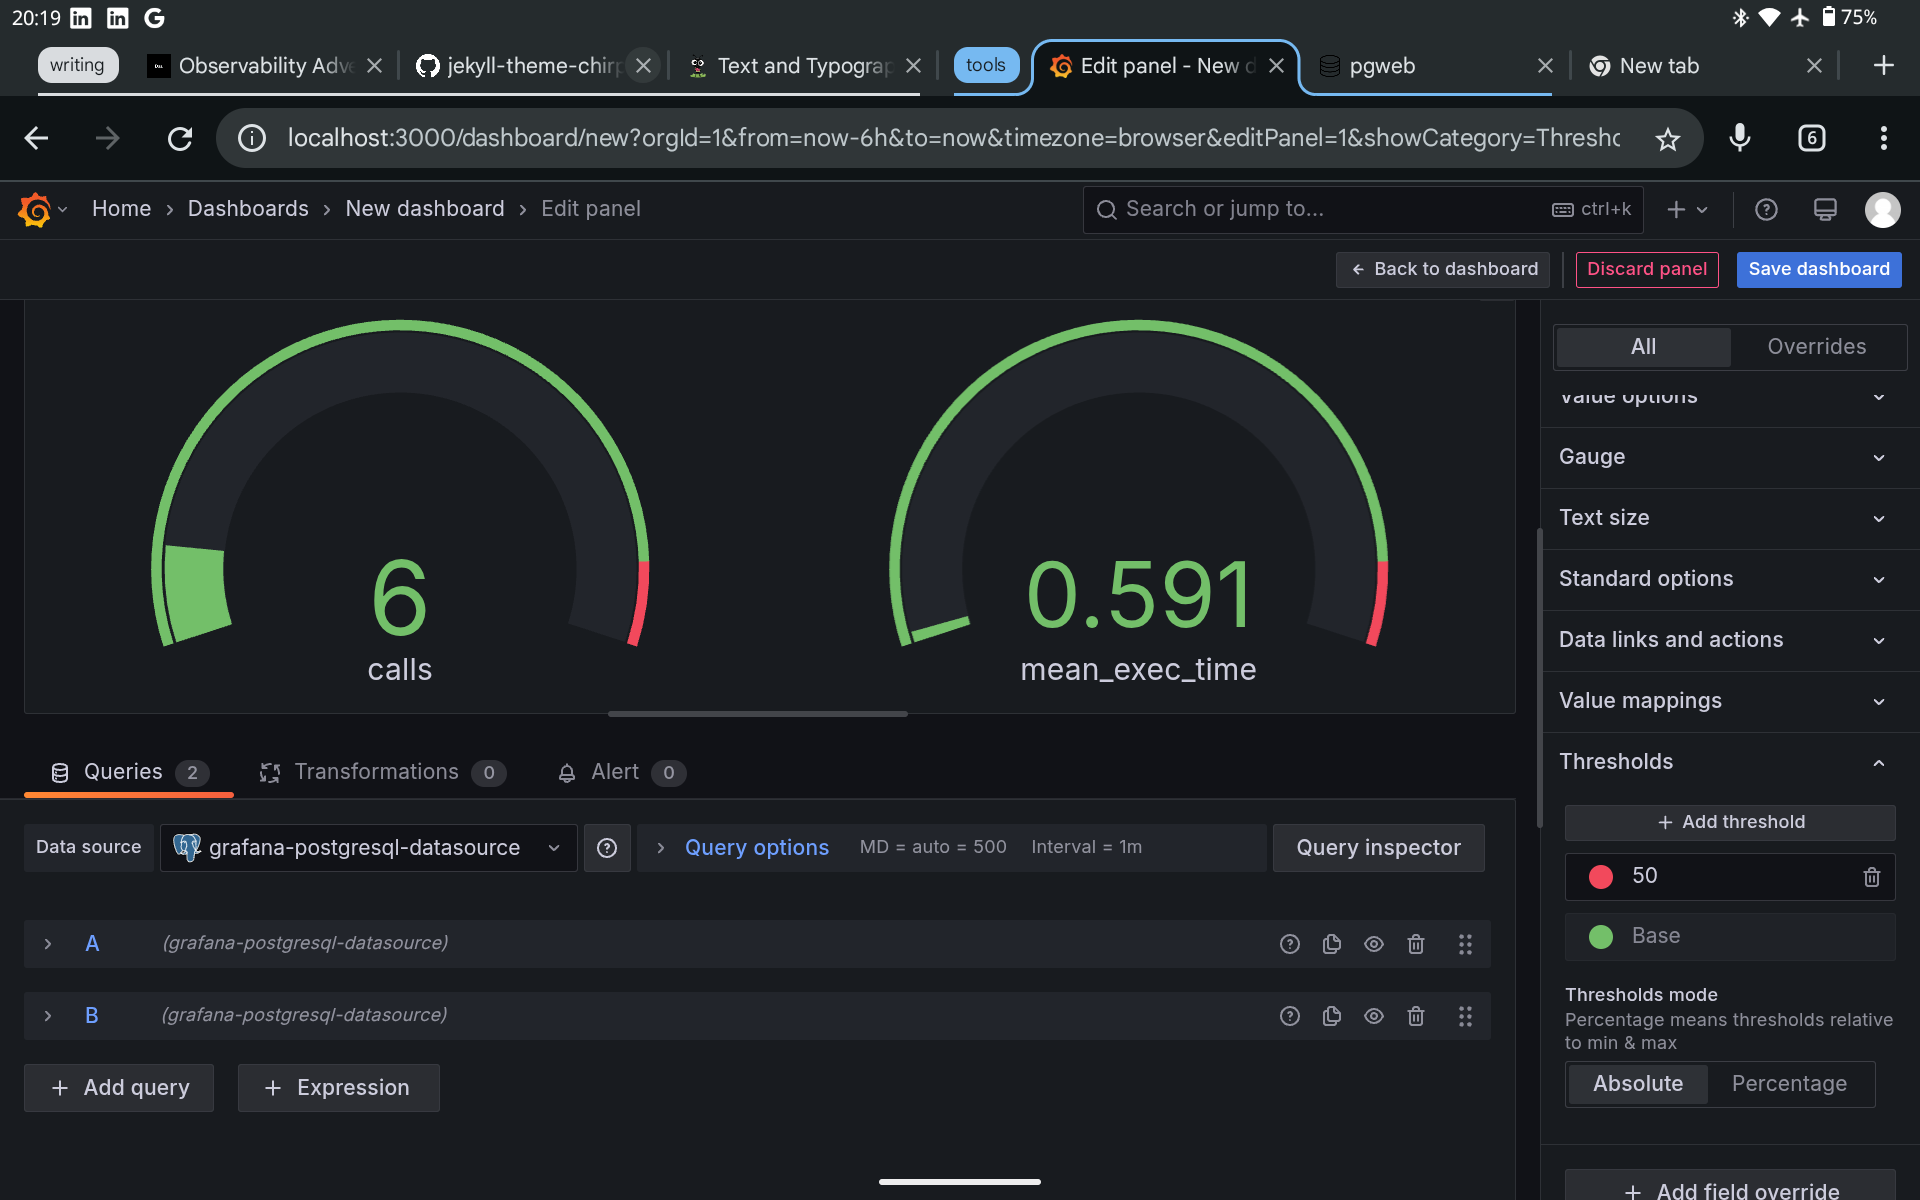 Guage view of specific aggregate stats
Concluding Thoughts
Having numbers to observe what is happening in your system is cool, but visualisation presents a better form of communication. Think of numbers as providing data, and good visualization dashboards are the information we can extract from the data.
I will explore more use cases and see how it goes. For now, I am stuck with postgres as my data source because of android’s limitations. I know some people would ask why don’t I use the cloud version. Well, I prefer taking the offline approach first, cloud later.
Alright, take care and keep exploring.